Why Is Light Blue on Toshiba External Hard Drive

Your Toshiba external hard drive doesn't show up on Windows, but it keeps blinking as if it has a connection to the PC.
Or maybe it does show up but appears to be empty, although it contains lots of data.
You've tried unplugging and replugging the USB jack so many times, but the problem persists.
The issue isn't limited to Toshiba.
Anyone with a Samsung, Seagate or any hard drive may experience it.
But don't get your tinsel in a tangle; our repair guide is here to help.
Read on to find and troubleshoot your problem, make your Toshiba EHD usable again, and recover any data you may have lost.
Toshiba External Hard Drive Flashing Blue Light (Causes, Fixes)

1. Restart Your PC

Rebooting is an effective solution to almost all computer-related issues.
It frees up your RAM, removes your caches, and forces your apps to restart.
As a result, potential software glitches will probably go away.
So, make sure you restart your system before all else.
If the issue is still there, move on with the next checks.
2. Make Sure The Drive Not Broken

Storage devices, especially hard drive disks, consist of highly fragile components.
So, they're vulnerable to accidental shocks, falls, or other physical damage.
To make sure the hardware isn't broken, listen carefully to the noise it makes.
If you hear any screeching, buzzing noise, it can be a sign of physical harm.
Even the usual beeping and whining sound you hear can become problematic if they get too loud or repetitive.
Also, look for any new dents, scratches, and other physical defects.
You can send your hard drive to a Toshiba repair service if you're sure the problem is dues to physical damage.
3. Check The Connections

Most issues with storage disks are due to a poor connection.
To make sure you have a strong one, check the wires, ports, and even your electric source:
- Connect your PC to a dedicated power outlet to make sure your USB port is receiving enough power.
- Use an alternative cable to see if your current one isn't damaged. Preferably, use the disk's original USB cable.
- Connect your EHD to another port or another computer.
If none of the above works, go to the next solution.
4. Take Off The Disk Enclosure
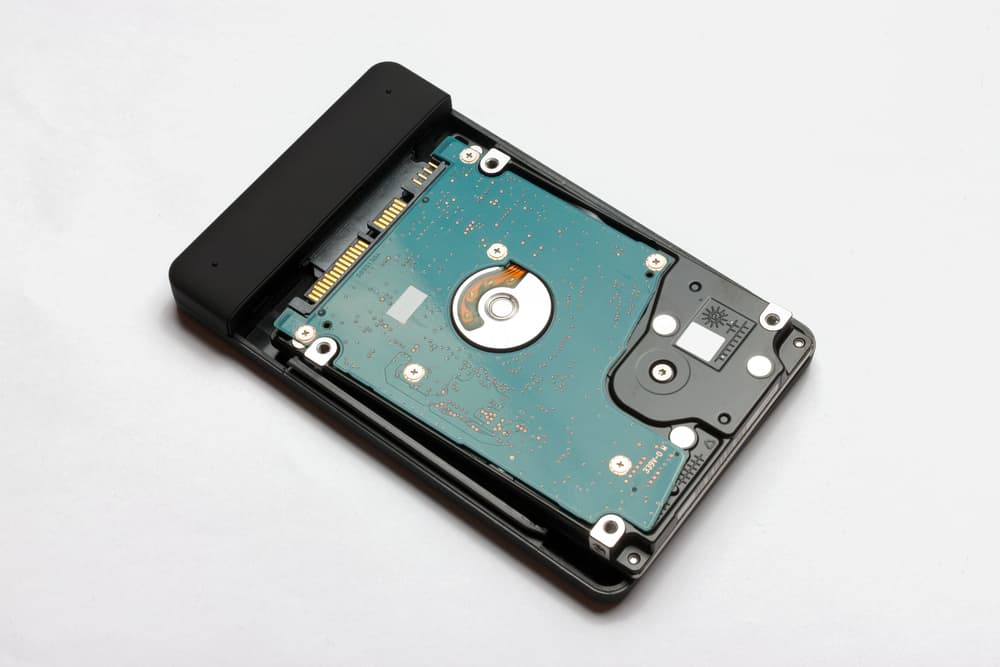
Physical checks aren't limited to cables, ports, and the HDD itself.
Most hard drives are inside a cover that, if damaged, can halt the device's functions.
So, logic demands you to check the enclosure before toggling the hard drive or any software settings.
Carefully take out the hard drive from its chassis using this instructional video:
Then, use an adaptor to connect the spare hard drive to your PC.
Alternatively, you can put another HD into the enclosure to see where the issue comes from.
If the chassis seems defective, buy a new one, and if not, continue with the following workarounds.
How To Fix Toshiba EHD Flashing Blue Light

1. Activate The USB Root Hub
There's a feature in your computer that can disable your USB root hub to save energy.
Although useful, this option can make it look like your hard drive is defective.
Here's one of the first places to check:
- Use your Windows Search at the bottom left to reach your Device Manager.
- You'll see a list of drivers.
- Scroll down to "Universal Serial Bus Controllers" and press the expandable arrow beside it.
- Right-click on the existing "USB Root Hub" and head to its "Properties."
- Go to the "Power Management" tab, and unmark "Allow the computer to turn off this device to save power."
2. Unhide Invisible Devices
If your hard drive isn't discoverable, you may have accidentally tweaked the settings to hide third-party devices.
It's also possible that a virus has altered your system configurations to lock it up.
Whatever the case, you can undo the changes using the steps below:
- Click on the Start icon, type "Device Manager" in the search bar, and open it.
- Select the "View" tab from the upper ribbon and click "Show hidden devices."
- Now, display other selections by hitting the (+) icon.
- Search for inactive devices which appear in grey.
- Right-click on them individually, and choose "Uninstall" or "Delete."
- Restart the PC and try inserting the HDD once again.
Even if your device isn't hidden, your system may be configured to hide its photos, videos, and other files.
So, you may also want to display hidden folders:
- Launch your File Explorer (If you don't know how, press Windows Key + E simultaneously).
- Switch to the "View" tab from the top taskbar and move the cursor right to reach the "Show/hide" segment.
- From there, mark the "Hidden items" checkbox to display the invisible items.
- Once again, connect your external hard drive to see if the items show up.
3. Run Your PC In Safe Mode
Safe Mode is a diagnostic feature that loads your OS in a basic state, where only essential software and drivers are active.
When you launch your PC in Safe Mode, you'll know whether the trouble comes from your default apps or other sources.
So, it could be easier to troubleshoot your system.
Here are the directions to enable this boot option:
- Hit the Windows button at the screen's down left corner, and open the "Power" switch (The same icon you use to restart your PC).
- Press and hold the Shift Key and click Restart at the same time.
- A blue screen appears, prompting you to Choose an Option.
- Select "Troubleshoot" from there and then go to "Advanced options."
- Once you choose the "Start-up Settings" and hit "Restart," a list of boot modes will show up.
- Select number 4 using the cursor or press F4 to restart it in Safe Mode.
Now, check your external hard drive.
If it works, both your OS and hard drive are in good condition, so you need to make changes to your drivers, apps, or other logical structures.
If the issue persists, you may need to update your Windows, check BIOS, or repair the disk partitions.
(we'll discuss each case below).
4. Update Or Install Drivers
Drivers are one of the premier things to check when it comes to peripheral issues.
Without an up-to-date, compatible, or intact driver, your OS can't recognize or work with any connected devices—and your hard drive is no exception.
First off, go to Device Manager to see if your hard drive appears there:
- Input "devmgmt.msc" in the Windows Search bar and Open the app.
- Then, press the arrow beside the "Disk drives" to show the drivers your OS recognizes).
- If you can't spot your Toshiba hard drive on the list, head on to the Toshiba website, and download the drivers from there.
- Find your hard drive by expanding the "Model" section under "Downloads,"
- Then, download the latest drivers for your device, extract the file to your PC, and run the installer pack.
But if your disk does show up in Device Manager, simply update its driver through there:
- After expanding the "Disk drives" options, move the cursor to your Toshiba external drive and right-click on its name.
- Press "Update driver" and then "Search automatically for updated driver."
- Let the computer do the job before you restart it.
5. Change Your Disk Drive Letter
Sometimes, when your external hard drive isn't working despite the flashing light, it's because there's a drive letter conflict.
Maybe it's because your computer has designated a drive letter to your disk already assigned to another network location.
As a result, your disk becomes unreadable.
So, change the drive letter to see if it makes things right:
- Write down all the existing drive letters (You can reach them in "This PC.")
- Open your Disk Management console (Type the name in the Search menu> click on the result> Run as administrator> Yes).
- Spot the corresponding drive of your Toshiba storage device in the right panel.
- Right-click on it and select "Change Drive Letter and Paths."
- Hit "Change" once you view the pop-up window.
- Now, select a new letter, excluding the ones you wrote down from "This PC."
(A and B letters are also exceptions because they belong to floppy disks).
- Press OK.
Note: You can also skip the above steps by using a Drive Letter Conflict Repairer.
6. Use The Command Prompt
Command Prompt is a Windows-based utility that lets you type in commands to the OS with pre-designed texts.
So, it's a good assistant to repair issues that you can't solve.
- Press R + Windows keys together to initiate Run.
- Then, insert "cmd" into the dialogue box and confirm.
- Paste "chkdsk /f n" in the command ribbon ( Don't forget to replace "n" with the drive letter of your storage unit).
- Press "Enter" to run the troubleshooting process.
- Input "Exist" after it's finalized to close the interface.
7. Delete Your Hard Drive's Registry Entry
- Search "regedt32" in the Windows search bar to get to the Registry Editor.
- From the upper ribbon, click your mouse on "File" and press "Export…"
- Choose a file destination to create a backup of your registry keys on your computer.
- Go back to the Registry Editor and navigate to "KEY_LOCAL_MACHINE."
- Expand the arrow and go to> SYSTEM> CurrentControlSet> Control> Class> {4D36E967-E325-11CE-BFC1-08002BE10318}
- Delete all the files, including "UpperFilter" or "LowerFilters" on the right pane.
8. Check Your BIOS For Connected Devices
BIOS is a piece of software that lets your PC load your Operating System.
But apart from its main functions, it takes care of data movements between your OS and connected devices such as your Toshiba external hard drive.
That's why it may fix your non-working EHD.
If your Windows can't detect your Toshiba EHD, it could be disabled in BIOS.
And maybe the motherboard manufacturer has set passwords for hard drives.
Access the BIOS to sort it out:
- Ensure the hard drive is attached and then turn on your computer (If it's already on, restart it instead).
- Press F2, F8, or Delete key (depending on your PC model) during the booting process. (Make sure to do it before the Window icon appears, right when you see some written texts with a black background.)
- Once you enter the BIOS setup interface, go to the "Boot Menu" or "Disk Information" category to view all the detected hard drives.
- Ensure the hard drive is enabled and contains no passwords.
9. Make The Hard Drive Known To Windows
A not-known or not-initialized issue occurs in two situations:
When you're attaching a brand new storage device to your PC.
And when you're using an old storage device with a new computer or operating system.
In both scenarios, Windows may not recognize the disk, and you need to initialize it manually.
Before anything, go to the Disk Management to check if the hard drive is marked as "Unknown" or "Not Initialized." (Type "Create and format hard disk partitions" in the Start menu and open the result).
If so, follow these instructions:
- In the Disk Management window, right-click on the hard drive you want to introduce to your computer.
- If it's marked as Offline, select "Online."
- Then, right-click again and choose "Initialize Disk."
- In the newly-opened window, mark the checkbox next to your hard drive's name.
- Now, select "MBR (Master Boot Record)" partition style and press OK.
Note: Initializing a disk is similar to formatting it.
So, if you have any data on it, you may need to retrieve it using a recovery tool (We'll describe how in the following).
You can also try your hard drive on your previous system and create a backup.
But if it's a new and empty storage device, there's nothing to worry about.
10. Resolve Partition Drawbacks
Partitions are parts of your hard drive that act like distinct physical devices, and each of them contains a share of your data.
But data corruption, improper disk removal, electrical failures, or malicious actors in your computer can sometimes make your disk partitions inaccessible.
Also, you may have deleted one of the partitions mistakenly when trying to adjust its size, etc.
Whatever the reason, if your PC doesn't detect your disk, chances are you're facing a partition issue.
And depending on what causes the problem, you have to try different methods to resolve it
- Create a Volume With a New Partition
If your hard drive shows "No Media," "RAW file system," or "Unallocated Space" in Disk Management, this guideline can help:
- From the Disk Management, right-click on the unallocated disk and press "New Simple Volume…"
- Press "Next" twice.
- Enter a volume size, and hit "Next."
- Specify a drive letter from many available options, and then click Next.
- Format the volume via default options (nothing needs to be unchecked or changed here).
- Select Next and then Finish.
- Use a Partition Recovery Tool
- Download and set up a recovery tool such as DiskInternals.
- Depending on the software interface, find a way to scan your storage device.
- An index will exhibit the recoverable items.
- Choose whatever data you want to retrieve, and copy it to your PC, if necessary.
11. Assign Your Toshiba EHD A New Format
Windows may not read a drive if formatted by Linux, Mac, or other operating systems.
It also doesn't work with file systems other than FAT32, NTFS, ReFS, or exFAT.
So, reformatting your Toshiba hard drive can bypass the trouble.
- Go to your File Explorer or This PC to locate the external hard drive.
- Right-click on it and press "Format…"
- In the popped-up window, go to the "File system" and expand the downward arrow to choose a format (NTFS, FAT32, etc.)
- Click Start and wait for the PC to undertake the rest.
Note: Although this method re-evokes your disk's functionalities, it doesn't maintain your data.
Once formatting the hard drive, all of its data will be cleared, and it's not easy to recover them.
How To Recover Files After Doing Up Toshiba EHD

Even if you don't format your hard drive, you may erase all of your data in any of the repairing methods.
That's because all these procedures are very sensitive, and a single misstep will put your efforts to waste.
So in case of data loss, here are some tools to recover most of your data:
- OnTrack EasyRecovery
- EaseUS Wizard Pro
- Disk Drill
- R-Studio
- Wondershare Recoverit
Source: https://www.thetechwire.com/toshiba-external-hard-drive-flashing-blue-light/
0 Response to "Why Is Light Blue on Toshiba External Hard Drive"
Post a Comment